Monday 21 December 2020

French Veterans

I was very pleased to recently receive an email from wargame rules author David Brown who wanted to know if I would like some Hinton Hunt troops that he had in his collection. He said he’d followed my blog for a while and wondered if I’d like the figures as they didn’t fit with his Perry and Connoisseur troops and he therefore never used them.

FN/9 Grenadier (marching), FN/8 Officer (marching), FN/6 Drummer (charging), FN/4 Colour-Bearer (charging) now in my possession courtesy of David Brown.

Well of course I was quite chuffed about this because I have long been an admirer of David Brown's General de Brigade rule system. In fact, I was about to embark on 15mm armies based for use with those rules when the Hinton Hunt’s came back into my life and I went down the vintage rules route instead.

6 x FN/9 from the collection of the late Eric Knowles.

The figures are fifteen marching French line Grenadiers together with an officer, standard-bearer and drummer. By a happy coincidence Tony passed on six more marching Grenadiers from the Eric Knowles collection the last time I saw him (that seems like 10 years ago) so together they give me a full 24-figure unit.

A full unit of Combined Grenadiers.

My thanks to David (and Tony) for such generosity, I hope to give the troops a spruce up and get them back into action sometime in the new year.

Friday 18 December 2020

British Heavy Metal

A couple of weeks ago I managed to obtain enough castings of BN/40 Dragoon (mounted) trotting in helmet with flowing horses tail plume to expand my existing squadron of six figures to a full twelve figure unit. I’m pleased about this because the figure is one of my favourites, being in a unique pose amongst the other figures in the Horse Attached Series. My suspicion is that this was the first cavalry figure that Marcus Hinton sculpted for the Napoleonic range as the pose seems designed for ease of casting and is similar to the mounted figures in the earlier American Civil War range.

The recent acquisitions are all excellent castings with no flash unlike the six figures I had already that were basically a solid block of metal from which I had to hew a model soldier. I love the fact that the previous owners had given up on the attempt and just painted over the flash.

Work is underway and this move also heralds a long overdue reorganisation of my entire British Heavy Cavalry.

Friday 11 December 2020

Erbgross Herzog Von Toskana Dragoons

That really does sound more like a made-up name for a unit on an imagi-nations blog, but it is the title on the Hinton Hunt painting instructions for AN.77 Austrian Dragoon (mounted) charging. The regiment is now finished, based and ready for action, although sadly not in time for the Battle of Windmill Hill.


The figures are all lovely original castings generously gifted to me by Don about ten years ago. My painting does make them look a bit cartoon like because of the black lines against the stark white but the overall effect from a distance is quite pleasing.

Friday 4 December 2020

General Winter

Last night when I went out to the Hinton Hut for a painting session the thermometer was registering minus one outside and plus one inside. Even after an hour of the heater running it was only up to fourteen degrees. This morning there was an inch of snow, General Winter has arrived.

It's a 10 yard dash from the back door to the Hut (although clearly, looking at the footprints I don't always make it).

I did however manage to prise open my frozen fingers just enough to put the finishing touches to the last two Austrian Dragoons. I like how this unit has turned out, the yellow and red really pop against the stark white. I just need to base them now.

Austrian Dragoons, perfectly camouflaged for the current weather conditions.

Next, I will be painting something red as there is more than enough white around here at the moment.

Monday 23 November 2020

The Battle of Windmill Hill - Conclusion

The Old Guard Grenadiers surge forward and succeed in winning the first rounds of melee against the Silesian Musketeers and the Jordis Regiment. Fortunately for me the Young Guard had been forced into square by the presence of my Uhlans in the valley on their flank.

The Guard Marins charge into the Prussian Guards who are reduced to 10 men and removed from play. To their right the Prussian Fusiliers are pursuing the 24th ligne.

Having seen off the Silesian Hussars, the Guard Heavy cavalry charge down my Russian Musketeers who had only just rallied the previous turn.

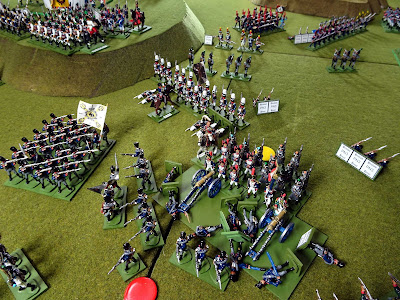
The French pile on the pressure against the Russian Grenadiers defending the Village.

I decided to pull back my Uhlans from the 'Valley of Death' but the French guns had them in their sights and managed to force a rout.

The threat to the Young Guard was therefore removed.

Matthew's order map for the final move - Turn 14.

The Guard Light cavalry charge forward trying to emulate the success of the Heavies but are thwarted by a square of the 1st Silesian Landwehr.

To their left, the Guard Marins charge into the Prussian Fusiliers and disorder them.

The second rounds of melee on Windmill Hill see the Allied line break and crumble in full rout.

Marshal Vorwarts can see that the game is up - not even a recount of VP's can save his army.

The Swedes arrive on the scene but its too little too late.

The men of the match on the Allied side were the Russian Grenadiers who remained on table for the full 14 turns - surely a record?

The French artillery were never quite able to bring their fire to bear effectively due mostly to the broken lines of sight presented by the hilly terrain.

The Emperor rides up onto Windmill Hill to congratulate the Guard.

The table at the end of play. The French won 17.5 to 16.5 on points however it wasn't really as close as the point score suggests as the Allied army was extremely battered and the only remaining units with good morale were all 'C' grade. My thanks to Matthew for a most enjoyable game.


Tuesday 17 November 2020

The Battle of Windmill Hill - Part 4

The French right flank at the end of Turn 11 - the Prussian cavalry have called a halt to their advance however the Cuirassiers on Oak Hill have suffered some devastating casualties from the French artillery losing 7 troopers in a single turn. In the distance the Uhlans can be seen taking the French Cuirassiers on North Hill in flank and routing them.

The centre of the field from the Allied side - the Prussians are pushing on to Windmill Hill whilst 2 Austrian regiments continue their path to the rear.

Bucking the trend for a new unit, the 59th Austrian Regiment have succeeded in routing the 105th ligne on Windmill Hill.

This is the ground between Windmill Hill and the Village (from the Allied side). The 24th ligne have pursued the routing Colberg Musketeers back through their supporting artillery overrunning the guns.

On the French side, the Guard Marins are moving up to lend support to the Poles and Swiss who are attempting to eject my Russian Grenadiers from the Village. In the distance you can see the Guard heavy cavalry pursuing the Silesian hussars to the table edge.

Matthew's order map for Move 12.

The Marins move forward whilst the Poles deliver a volley that drops 3 Russian Grenadiers. Behind the Village the Guard light cavalry have just ridden down 6 of my Jagers but have stopped just short of the square of the 1st Silesian Landwehr (well, you would wouldn't you?).

The fighting on Windmill Hill is intense - the Silesian Musketeers have just wheeled to take the 9th legere in flank.

But the Guard are coming up now - the climax of the battle is drawing near.

The table at the end of Turn 12.


Tuesday 10 November 2020

The Battle of Windmill Hill - Part 3


Matthew sends his Cuirassiers thundering down the "Valley of Death" on my left flank. He manages to rout my Hussars but without support surely this can't end well for him?

On his own left he sends the Guard cavalry forward led in person by Murat.

Meanwhile Massena's Division has been ordered into square, clearly Napoleon is not expecting great things from his own heavy cavalry.

Not a sight we see often on my table - here comes Bernadotte with the Swedish Division.

By the end of turn 9 the French seem to have the advantage on Windmill Hill.

This is Matthew's 'order map' for turn 10. Without these maps I'm not sure it would be very easy to play the game.

The Guard heavy cavalry charge forward and take fire from no less than 6 muskets and 6 Jagers without any loss. The Silesian Hussars have seen enough.

The French lancer/chasseurs charge forward between Windmill Hill and the Village. They ride down 6 Prussian Jagers but are devastated in return by musketry - the Pavlograds are avenged!

How can this be? The Cuirassiers continue their "Death ride" and wipe out an Austrian battery for no loss.

It's not all good news for Matthew however as his Carabineers and the DK Cuirassier/dragoons are routed, even poor old Ney is down but I think its just a scratch.

This is the table at the end of turn 10, we have 4 more turns to play.


Wednesday 4 November 2020

The Battle of Windmill Hill – Part 2


Turn 4 and the Emperor has arrived on table with Davout's Division. From now on the French get an extra +1 on the initiative die roll each turn.

Davout's men are followed hot on their heels by Ney with the Heavy Cavalry.

On the Allied side the Austrians arrive - well it had to be them didn't it?

The Prussians start arriving next - this is Zieten's Division moving west towards the Village.

This is the situation at the end of turn 7. Because of the terrain and the way the troops are arriving in succession, we have a much more challenging game developing than the usual line 'em up and shoot 'em down type.

This is Massena's Division manoeuvring on the French right flank.

Turn 8 and The Guard arrive, all the troops are on the table now (about 800 figures in all).

The Allies are making a strong move to reinforce their right and make sure they retain the Village.

The French and the Austrians get to grips on Windmill Hill. So far casualties have been quite light but as we head into turn 9 this may be about to change.

Finally the compulsory nostalgia shot - the sort of game I wanted to play when I was 12!

I thought I would briefly explain how we’re running the game for those of you who might be interested:

I began by writing an OOB breaking each army into six Divisions and then set up the table, Matthew then got to choose which army he had and whether he would be fighting from the north or south table edge. The Advance Guard of each army was then deployed on the table.

Each of us had drawn up an Order of March for our armies with one Division allowed to come on the table each turn starting with turn 4 (we kept this secret from each other for added tension). The troops had to arrive on the base line of the central terrain square in column and were issued with general orders at that point.

I then play through each turn using Matthew’s orders for the French (having written my own before I read his email). At the end of the turn I update him with casualties, unit status etc and supply him with photos of the battle and let him know which side has the initiative for the next turn.

So far it is all working very well and the system has been improved by Matthew producing a very nice map each turn showing the position and intentions of his units.