Tuesday 8 May 2018

Battle of the four Generals (part 2)

I had set the troops out on the table before the three visiting generals arrived trying to put roughly equal forces in each half of the battlefield. As guest of honour WM got to choose his command first and plumped for the French left comprising both the Austrians and the Imperial Guard. Tony took the French right and Goya the allied right which meant I commanded the Prussians on the allied left. This is how the battle progressed:

The French pushed forward the voltigeurs of the 9th legere to occupy the farm
and they were soon popping away at our allied line. However it would need
a bit more muscle than that to secure the objective regardless of how pretty
their uniforms were.
The Duke, cool as ever, calmly ordered the 30th foot (yellow flag in the
distance) to take the hill to their front whilst the 95th returned the fire of
the enemy skirmishers.
Meanwhile I ordered my Prussian infantry to advance en-masse and what a
splendid sight they made. WM's three units are in the front line while my own
bring up the rear.
This is turn 2 and already you can see how far the allied line has advanced. The
French have also been active and are pressing to take the farm. The Prussian
heavy cavalry are still in reserve near the table edge waiting for their time to
come (reserve units are free to move along the table edge to a new position).
Here you can see that my infantry have already secured 'the rock' (the objective
on this side of the table) while my cavalry get stuck into the enemy horse on the
extreme flank.
And here are WM's famous Leib Hussars about to make mincemeat of the
Brunswick Hussars.
The fight for the farm begins in earnest and the 45th ligne have just occupied
the buildings. They have plenty of support coming up including the Young
Guard and the Guard Marines both about to have their baptism of fire.
On the French extreme left another cavalry battle is under way. The lancer
/chasseurs seem keen to get to grips with  the 11th Light Dragoons while
Austrian Hussars move up to support them.
With enemy cavalry milling around on their flank the Austrian infantry have
cautiously opted to form square leaving only the Jagers to contest the hill with
the British. General Mack wisely takes refuge in the centre of the square of
the Splendid Splenys.
Although my Prussian infantry have siezed an objective they are starting to
take casualties from artillery fire - steady mein children! These are WM's 10th
(1st Silesian) and 18th (6th Reserve) regiments.
The 30th Cambridgeshires ascend the hill to take on the Austrian Jagers in a
fire-fight. However the British have more support close at hand than the
Austrians due to their reserves being pinned in square.
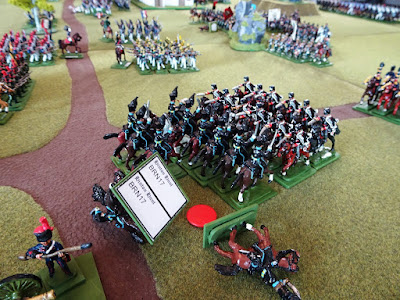
Having dealt with the Brunswick Hussars, the Leib Hussars have just ridden
down a battery of Guard horse artllery - the Prussians are on a roll!

Part three to follow...

9 comments:

Ross Mac rmacfa@gmail.com said...

Holy Haie!

I don't do Napoleonics..I don't do Napoleonics..I don't do Napoleonics..I don't do Napoleonics..I don't do Napoleonics..I don't do Napoleonics..I don't do Napoleonics..I don't do Napoleonics..I don't do Napoleonics..


Anonymous said...

How cunning of WM to bring along C-class Prussians then opt to pay Imperial Garde, although it seems that those Leib Husaren continue to perform above and beyond. Please don't keep us waiting too long for Part 3 - an OOB breakdown would also be nice to see.
Rob

WSTKS-FM Worldwide said...

A feast for the eyes!

Best Regards,

Stokes

lewisgunner said...

Well, you should see the piping on WM's Prussian hussars.....its just staggeringly lovely.

Stryker said...

That it is Roy, that it is!

Mark Dudley said...

That looks like a fun game. The Prussian Hussars look depleted but I am sure they have one more charge in them.

Looking forward to see the next instalment.

Anonymous said...

Nice to see the Prussians doing well

Aly Morrison said...

Wonderful... :-)

All the best. Aly

Captain Nolan said...

Huzzah for the hussars! This is just the ticket. Inspiring.